Stable-Diffusion AI 绘画

2023-06-13 20:25:14 486

  1. git clone https://github.com/CompVis/stable-diffusion.git
  2. 进入stable-diffusion目录
  3. 在这里注册一个账号: https://huggingface.co/ 并生成个token
  4. 安装CUDA https://blog.csdn.net/qq_35930739/article/details/128167167
  5. pip install torch -f https://download.pytorch.org/whl/torch_stable.html
  6. pip install -e git+ https://github.com/CompVis/taming-transformers.git@master#egg=taming-transformers
  7. conda install torchvision torchaudio pytorch-cuda=11.7 -c pytorch -c nvidia 选择合适的pytorch-cuda版本
  8. pip install transformers==4.25.1 diffusers invisible-watermark
  9. pip install -e .
  10. huggingface-cli login 输入生成的token
from torch import autocast
from diffusers import StableDiffusionPipeline
import torch

if __name__ == '__main__':
    # https://github.com/CompVis/stable-diffusion/issues/69#issuecomment-1260722801
    torch.backends.cudnn.benchmark = True
    torch.backends.cudnn.enabled = True

    pipe = StableDiffusionPipeline.from_pretrained(
        "CompVis/stable-diffusion-v1-4",
        torch_dtype=torch.float16,
        use_auth_token=True,
        safety_checker=None,
        requires_safety_checker=False
    ).to("cuda")


    prompt = "a photo of an astronaut riding a horse on mars"
    with autocast("cuda"):
        result = pipe(prompt, height=256, width=256)

    image = result[0][0]

    image.save("test.png")

Stable-Diffusion AI 绘画

git clone https://github.com/CompVis/stable-diffusion.git进入stable-diffusion目录在这里注册一个账号: https://huggingface.co/ 并生成个token安装CUDA https://blog.csdn.net/
2023-06-13

freemarker 时间显示不正常 设置时区

项目在本地开发的时候显示正常,部署上服务器就一直差8个小时,最后发现freemarker官方文档有这样的说明time_zone:时区的名称来显示并格式化时间。 默认情况下,使用JVM的时区。 也可以是 Java 时区 API 接受的值,或者 "JVM default" (从 FreeMarker 2
2020-03-28
IDEA 2019.1 xml 不高亮

IDEA 2019.1 xml 不高亮

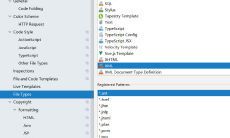
前几天更新了idea后,发现xml里的代码都没有了高亮,变得跟记事本一个德性了打开setting ,搜索 File Types,找到xml项, 查看下方的匹配格式,果然没有xml,(idea真是厉害)点击右方的+,输入*.xml,点击ok,解决问题
2020-03-28

npm install 淘宝镜像

npm install --registry=https://registry.npm.taobao.org
2020-03-28
Java中方法的参数传递机制

Java中方法的参数传递机制

来看一段代码 public class Man { private String name; private Integer age; public String getName() { return name; } publi
2020-03-28
基于自定义注解手写权限控制

基于自定义注解手写权限控制

方法一: AOP 方法二: 拦截器项目结构项目依赖<dependencies> <dependency> <groupId>org.springframework.boot</groupId> <artifactId>spring-boot-starter-w
2020-03-28

Docker 部署 详细全过程 附代码

Docker 部署本站 全过程环境:CentOS7.61. 安装Docker其他版本CentOS可以参考这个https://help.aliyun.com/document_detail/187598.html查看本机内核版本,内核版本需高于 3.10uname -r 确保 yum 包最新yum u
2020-03-28

SpringBoot 启动普通java工程

引入依赖<dependency> <groupId>org.springframework.boot</groupId> <artifactId>spring-boot-starter</artifactId> <version>2.0.9</version> </dependency>
2020-03-28

Vue.js DOM操作

<template> <input type="button" @click="reply($event)" value="回复"> </template> export default { methods: { replyFun(e) {
2020-03-29
CentOS7编译调试OpenJDK12

CentOS7编译调试OpenJDK12

1. 下载源码https://hg.openjdk.java.net/jdk/jdk12点击左侧的browse,再点击zip,就可以下载zip格式的源码压缩包。unzip xxx.zip 解压文件2. 安装jdkyum install java-11-openjdk-devel -y3. 运行con
2020-04-23
编写自己的Spring Boot Starter

编写自己的Spring Boot Starter

1.新建一个maven项目命名规则统一是xxx-spring-boot-starter完整pom.xml<?xml version="1.0" encoding="UTF-8"?> <project xmlns="http://maven.apache.org/POM/4.0.0"
2020-06-29