JNI
Java Native Interface
首先写一个java类
package com.test;

public class JNI {
    //native关键字
    public native int add(int a, int b);
}
执行javah命令
注意路径
我的JNI全路径为E:\PROJECT\java\java_test\src\com\test\JNI.java
所以在src目录中执行
javah -classpath . com.test.JNI
生成了一个 com_test_JNI.h文件
建立vs项目
打开vs2019, 选择dll项目, 初始项目可能有其他文件, 全部删去即可
进行配置
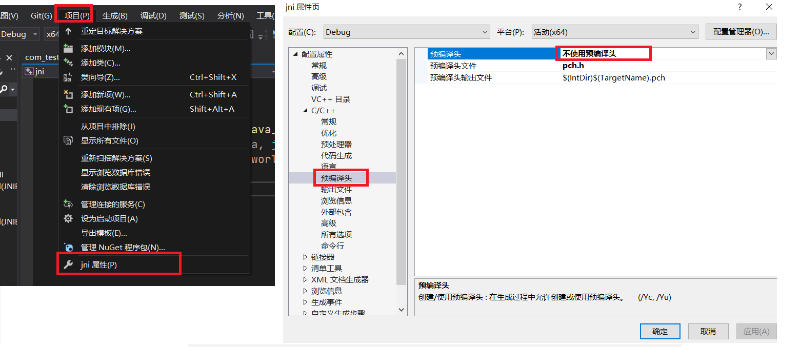
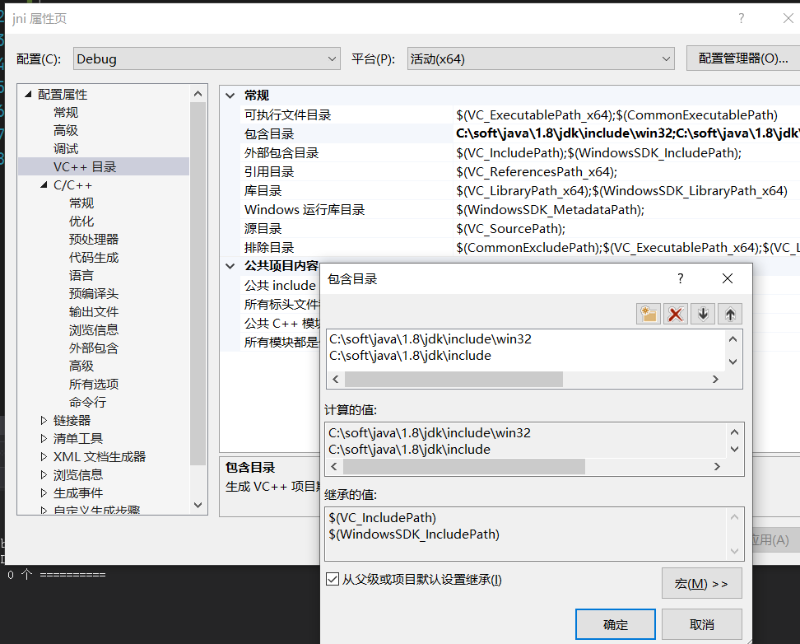
包含目录添加jdk下的两个文件夹
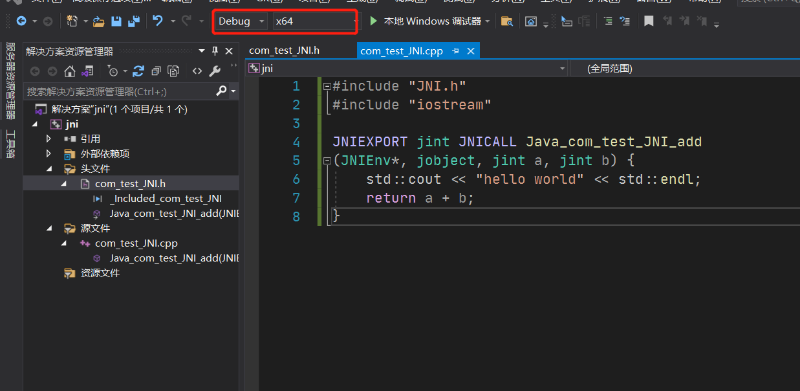
将生成的头文件加入项目中, 再在源文件中新建.cpp, 实现头文件中声明的函数
com_test_JNI.h
#include <jni.h>


#ifndef _Included_com_test_JNI
#define _Included_com_test_JNI
#ifdef __cplusplus
extern "C" {
#endif

	JNIEXPORT jint JNICALL Java_com_test_JNI_add
	(JNIEnv*, jobject, jint, jint);

#ifdef __cplusplus
}
#endif
#endif
com_test_JNI.cpp
#include "com_test_JNI.h"
#include "iostream"

JNIEXPORT jint JNICALL Java_com_test_JNI_add
(JNIEnv*, jobject, jint a, jint b) {
	std::cout << "hello world" << std::endl;
	return a + b;
}
项目如下, 选择debug, 看自己机器情况选择x64或是x86
最后点击菜单栏, 生成->生成解决方案, 然后在vs项目路径对应的Debug文件夹中, 可以看到对应的xxxxx.dll
使用.dll
public class Main {
    public static void main(String[] args) {
        //需要将.dll文件放在java.library.path显示的路径下
        System.out.println(System.getProperty("java.library.path"));
        System.loadLibrary("jni");
        JNI jni = new JNI();
        int add = jni.add(1, 2);
        System.out.println(add);
    }
}
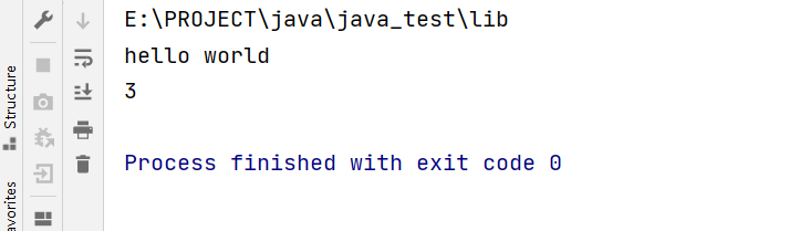
运行输出
注意: 本文归作者所有, 未经作者允许, 不得转载. 若有谬误, 欢迎指出